How to build a display for your GT Army
My 2003 Vancouver Grand Tournament Display
Well Christmas is over and I'm feeling pretty good. I got to recharge myself somewhat on the island. And after it was all over I build a display stand for my army. I hope it all fits together, I used cardboard to stand in for the models and I know the browns won't match perfectly hopefully it all ends up all right. Here is how I did it.
First I cut (with the help of my mom) out a cardboard (or foam board) base to stand in for the actual model and I drew some on my foam board base. I also bought a picture frame which will provide stability and hopefully make my display look a bit better.
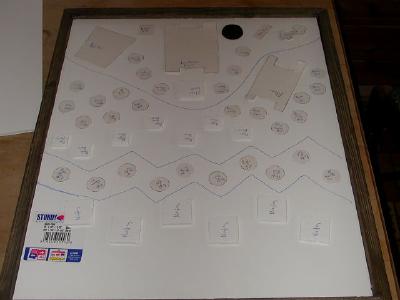
After I was satisfied that all the models would fit and display well, I used the insulating foam my uncle and aunt gave me years ago to make terrain and my foam cutter, which I'd never tried until now. I also had to cut the foam card with a little exacto knife prior to this, I think I needed a bigger knife. For my cuts I used a metal square to try to achieve a nice straight line. After I finished carving the hills, I taped on the model base markers. I ended up with a slightly tweaked layout.
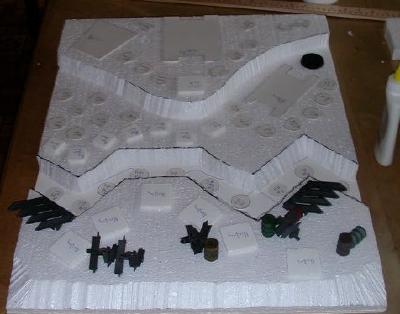
I ended up using my Gorka Morka tank traps which were already painted and assembled rather then the ones I got in my 40K 3rd edition box. I never used the buildings or even another piece of foam card as a background, though I thought of it.
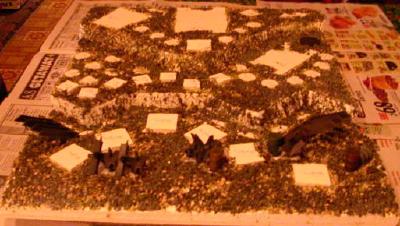
I put watered down glue, then cat litter onto the foam. I should have put two doses of cat litter in hindsight. I also probably should have painted the foam black first too. I then put another coat of watered down white glue and poured beach sand onto that. Finally I applied another coat of watered down glue on top and left it over night. It is important to allow ample drying time.
Paint it Black
It is hard to paint sand that is mixed with glue and still wet. This was because the beach sand itself was wet. I used a latex paint I got at Home Depot and ended up putting on three coats some of it was gobbed on pretty thick to get in all the crevices.
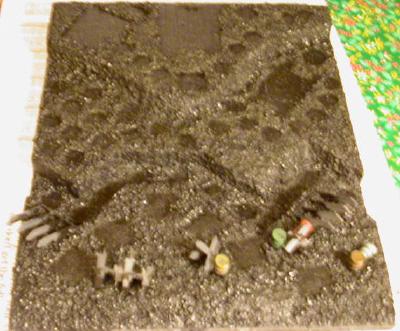
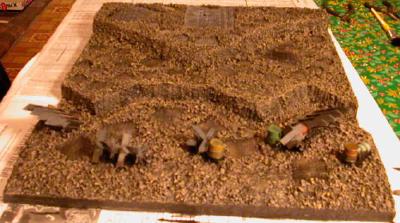
By now it was really starting to look good. The trench which was on the foam board didn't jive to well with the wet glue. I removed the stand in's before painting it black. You can see where the models will go fairly clearly now. The two big blank spots on the hill are the Defiler and Landraider which I still haven't finished building back in Vancouver.
I debated not doing the dry brushing until I got the display to Vancouver. I'm getting my mom to bring it over as I always walk on to the ferry whereas she usually drives everywhere. I ended up using the paints I got at Micheal's on Boxing Day. I also got the picture frame from there. It and Home Depot are great sources for modeling projects. I still need to fix up the tank traps and maybe adjust the brown but the basic display base minus frame is pictured below.
Next I built my Defiler.