1500 point Battle Report: Re-match with Rob
After going 18 months without playing a game of 40K, Rob and I arranged my second game in a week. This game would once again be 1500pts, played on a six by four table and would use the 40K v3.5 rule set based on the pdf that was posted on GW's site. Even though I stated I didn't want a mission with Reserves we once again rolled up one (Rescue). We used Rob's house reserves rule again.
My pre-game thoughts
My goal for this game was to try harder to win. Last game I was content to push my models around the board without much of a plan. This time I tried to co-ordinate my attack better.
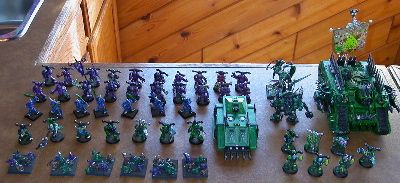
Even using about a third of my painted miniatures (the best looking third) I still had a variety of troops to choose from. The army I ended up with is an amalgamation of my Calgary GT army and my previous Vancouver GT army. It does contain 17 figures I painted in Japan but they were Plague Marines with bolters and Plaguebearers so they did not add any new capabilities to my force.
For this game I decided to use my Landraider as I was disappointed with how it performed in my last GT army. I also decided to use Slim as I had yet to field him in the new Codex. The rest of my army was the usual assortment of Plague Marines, Plaguebearers, and Nurglings. I brought a lone Rhino and the Beast Rabaan with no Heavy Flamer, cause honestly I never ever get to shoot the thing.
- HQ Slim, Daemon Prince of Nurgle, CCW*2, Daemonic Stature, Wings, Daemonic Fire, Nurgle's Rot, and Daemonic Aura. 132 pts
- TR Syphilis Squad: 20 Plague Marines with bolters, 2 with Plasma guns. They have an Icon. 400pts
- TR George Jrs: 6 Stands of Nurglings. 60pts
- TR Neatherworldly Mathematicians: 7 Plaguebearers. 112pts
- TR The AXE Gang: 7 Plague Marines, two with Mealtas, two with Bolters, and three with Bolt Pistols. Aspiring Champion of Nurgle armed with a Power Weapon, Nurgle's Rot, and Spikey Bitz. They ride in a Rhino with Smoke Launchers. They have an Icon. 232 pts
- TR Burning Sores: 7 Plague Marines with bolt pistols, Infiltration, Icon, two flamers, aspiring champion with Power glove, Nurgle's Rot and Demonic Mutation. 196pts
- HS TWAIN: Landraider with two twin linked Lascanons and a twin linked heavy bolter. It also has smoke launchers. 253 pts
- HS The Beast Rabaan: Dreadnought with twin linked autocannons. 110pts
Rob's pre-game thoughts
This battle will see the same army as the previous one (Kyuquot 737th. Imperial Guard). Of the changes that Muskie made to his army the most concerning to me was the winged Daemon Prince. We would be playing a Rescue mission which can be a real nail-biter or completely locked up by one side by turn 4 as whomever has possession of the whats-it at the end of the game is the winner no matter what else happens on the field of battle. I planned on deploying both my infantry platoon and the Armoured Fist squad on my right flank and their job would be to advance into the creek and trees to gain the benefit of cover. If the opportunity came up to move towards a marker or enemy unit with the prize came up they would take advantage of it. As my Rough Rider squads came available they would come on the left flank and their main objective would be to aggressively move on the markers. They would be supported by the Leman Russ and the HQ in it's Chimera. At this point I had no idea where the Heavy weapon squads would be coming on; that would largely be decided by where the enemy was when they became available.
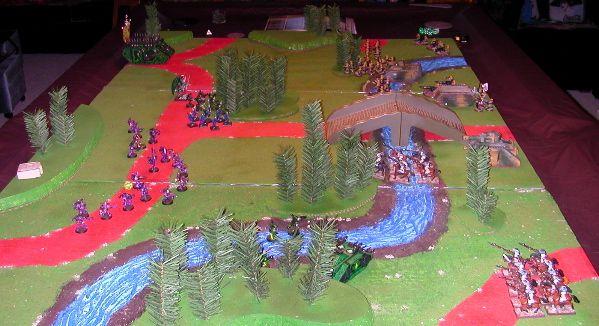
Army Deployment
I (Muskie) won the role to choose sides and I got to choose who went first. Having deployed in the corner with the bridge last game I chose to do the exact opposite. I deployed on the long edge opposite the bridge. As it ended up more of the objectives might have been slightly closer to me but some were in the middle of a wide open field. I placed Syphilis on my biggest hill, they still all didn't fit. I had planned to use them to cover the advances of my other Plague Marine squads and the Nurglings. The Nurglings were deployed directly in front of Rob's troops to give them something to shoot at and to capture the nearest objective. I allowed Rob to go first as I doubted anything would be in range for me anyway.
Turn One: Advancing on the Objectives
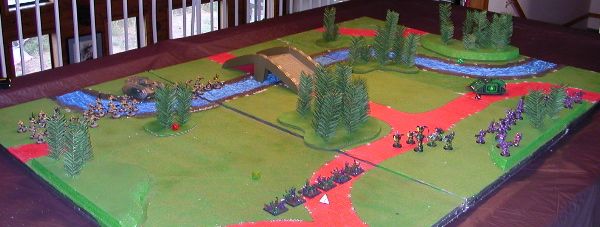
Turn one was a non event. The opposing forces advanced everything except Syphilis. Rob succeeded in causing a single wound to a single Nurgling stand. I did not even shoot a bullet. The D8's scattered around the table represent the objectives.
Turn Two: Reinforcements
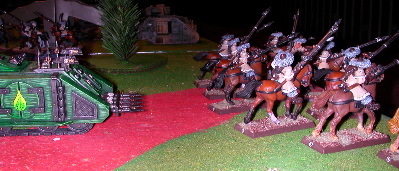
Rob brought on his Leman Russ directly opposite of Syphilis and proceeded to open fire with his Battle Canon. He also brought on one of his Rough Rider Squads who advanced on the river. Rob only managed to kill a lone Plague Marine. In my half of the turn Slim and the Beast Rabaan showed up. Slim used the large forest as cover and leisurely strolled forward. The Beast was all set to engage in a gunnery duel with the Chimera opposite when he was overcome with Blood Rage and ran 5 inches straight ahead instead. Faced with the Leman Russ I decided to move Syphilis off the hill towards the objective in front of them. This also freed up the rhino squad to race ahead to the next objective.
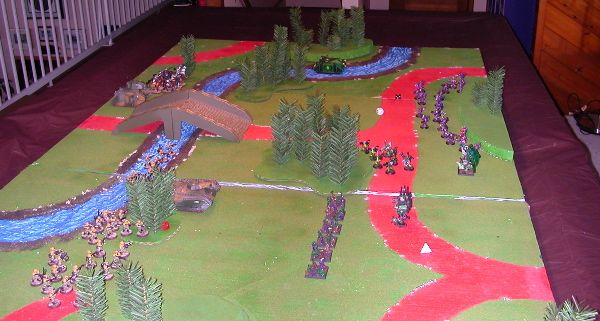
Turn Three: More Reinforcements
Rob's heavy weapons teams showed up which wasn't that useful as they could not move and shoot. Rob's command Chimera was also deployed on the same flank with his infantry platoon. Rob's shooting dispatched a Nurgling and some Plague Marines. He also stunned the Beast Rabaan I believe.
In my half of the turn I brought on the Landraider. I took out the command Chimera with a well placed lascannon shot. At the end of this turn I had captured three of the objectives including the one with the Princess. Syphilis was now in possession of her and we marked this with a D12. Slim, the Neatherworldly Mathematicians and the Burning Sores were slowly walking around or through the large stand of trees in the center of the table.
Rob's Turn Four: Let the Killing Commence
The rest of Rob's army finally arrived in the form of another Rough Rider squad. The infantry platoon was in range of the Nurglings and in a fury of flashlights and other miscellaneous armaments wiped them out. The Beast Rabaan was also dispatched possibly with krak grenades from some of the many grenade launchers deployed across from him.
Rhino Routes Rough Riders
Although I was being widdled down on my left flank, I had possession of the objective and was slowly working my troops forward through the trees and creek beds. Having nothing better to do with it I decided to gun the engine on my rhino at the newly arrived Rough Riders. Despited being led by the s argent with the Honourificus and thus leadership 9, Rob rolled an 11 and since they were right on the edge of the table off they ran!
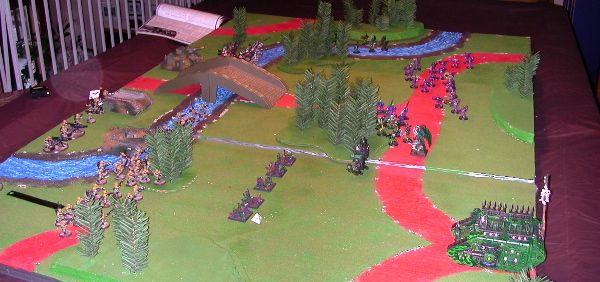
Turn Five: H2H Commences
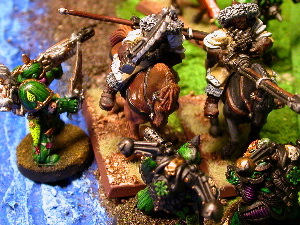
This turn saw the combined firepower of Rob's right flank fall upon the Burning Sores ultimately wiping them out in turn six. Rob also raced his remaining Rough Riders along the river bed to charge the AXE Gang. Rob killed three of them losing two Rough Riders in return.
I didn't get to do much shooting and forgot to use Nurgle's Rot. My Landraider ignored the Chimera and the heavy weapons teams and instead poured all it's shots into the IG squad directly in front of it. I knew under the new rules I could target the others but I didn't anyway. I probably should have shot the heavy weapon's teams, the Chimera was hull down as it had stalled in the river.
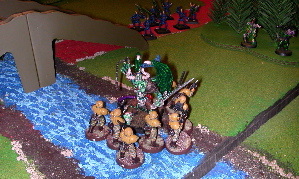
In my half of the turn I bounded Slim towards the river's edge and charged the guardsman. None of my other squads could make it into H2H. Syphilis continued it's tactical withdrawal. TWAIN continued to single out the one IG squad for extra special attention, reducing a view more members to bloody stumps in boots. Slim killed three or four guardsman but Rob was happy to see them stand their ground.
Turn Six: This is the end

The arrival of turn six brought the realization that Rob could not recapture the objective. His vaunted Rough Riders were vanquished and all he had was a Leman Russ on that side of the bridge. We finished up the game with Rob wiping out the Burning Sores and Slim and the Neatherworldly Mathematicians wiping out the squad of guardsman opposing them.
My post-game comments
It's a well known fact that whenever you win at 40K it's due to brilliant tactics and army selection and whenever you lose it is due to bad dice rolls or an opponent with a cheesy army list. I don't think my army list was particularly brilliant. All these units and support vehicles I'd used before. As for my tactics, the arrival of the Leman Russ forced me to abandoned the hill I'd hoped to use as a firebase. Other than that my plan worked perfectly. I advanced as fast as I could to the objectives and was lucky to find the princess. I then just had to not die.
I really think the Landraider is too big and expensive. It killed a bunch of stuff but not 253 points worth. The new rules may help it but I like the armament options of the Predator better. I will touch up the paint job of my existing Predator but it does not have the twin linked lascannon turret. I bought a new Predator which I had planned to model with the twin linked lascannon turret but I'm not sure when I'll have time for that.
Another thing I've realized is having two flamers in the same squad doesn't mean a whole lot. In 12 turns of gaming since I got back from Japan I've yet to use any of my flamers. I'll still take a flamer or two in my next GT army because they are useful in City Fighting and against fast moving horde armies. I think one flamer and one mealta might be a good way to go with my green squads. I was planning on moving away from Bolt Pistols but I don't know if I'll be able to paint enough new Plague Marines to completely phase them out of my next GT army. I should be able to paint some more special weapons troopers or I'll just change the knee pad markings... I always forget that I can field Plasma Pistols, I'll have to try an all pistol squad it would have the advantage of at least being better in H2H.
I don't think 20 models is the optimal squad size for Plague Marines. Originally for my last GT army and for this one I was going to go with a 14 model squad thus getting a free champion. I also toyed with the idea of 20 chosen as a retinue for three times Nurgle's sacred number. I still don't think that will be too popular with my opponents so I decided to try just a twenty member squads. It is hard to kill but the most models that have ever gotten to shoot in a given turn is seven. Perhaps against orks, tyranids, or the dreaded Rhino Rush they would get to maximize their fire power. I'm going to keep the squad at 20 for now but it's tempting to reduce the size of the squad and spend the points elsewhere. I need to get the rest of my terminators painted to try the reapers out. Guns that can shoot over 24" are in short supply in a Nurgle army.
Rob's post-game comments
Well... at least I didn't get massacred right? I'm not sure that I made any real mistakes although when Muskie's Big Unit located the Prize near his table edge at the end of turn three I was immediately aware that my chances of acquiring it were somewhere between nil and none. I had already brought my HQ in it's Chimera into play on my right flank, which wasn't my initial plan and all I had on the right flank was a unit of Rough Riders and the Leman Russ. On turn 4 I brought the second unit of Rough Riders on led by the Veteran Sergeant with the Honourificus, moving a whopping 7" when the "Fleet of Hoof" roll was included. This proved to be important as Muskie's Rhino chose to tank shock the unit and they failed their Leadership test (on LD 9!) and fled the board (probably screaming like a bunch of prepubescent schoolgirls at a Horror flick)! I figured that my best option at that point was to try and cause enough casualties to the Big Unit that they would fail a morale roll and flee, dropping Princess Buttercup and the game ending in a draw. But wait!!! That squad of Plague Marines is Fearless! The game was over then and there. Ah well- at that point I decided to go for taking as many enemy models off the table as possible and hoped that the arrival at my battleline of the Daemon Prince didn't interfere too much.
Despite MBA program still thinking about Nurgle.