Well I finished my official army list. You can read it in the other browser window, I handily pop'ed up for you. If it didn't pop up you can read the army list here. I had to agonise over the last 35 points for a few days, but now that I've decided upon my list, it is fait accompli that I'll win. Now I just have to do all the painting.
I thought I'd run through the reasoning behind all the entries and then outline my basic strategy in each of the six missions as of now. I plan to actually practice the six missions and fine tune my strategy leading up to the tournament. I only need to paint one Rhino, one dreadnought and nine Plague Marines. I plan on touching up some of the older ones and painting campaign badges on all the models to commemorate this historic event. I also plan to paint up Nurgling infested objective markers, using the new pathetic Nurglings.
Now that I got me a cold beer and put on some funky music I'm red to go.
In the warm up games so far, I've rolled like shit for Slim. I was getting really discouraged. I looked at him more closely and saw that even without the Plague Sword he still ignores armor saves in H2H. His other problem was getting bogged down in little annoying guys so I figured Nurgle's Rot would help with that. I still plan for him to get stuck in ASAP. He has no ranged attack so there is no point in dilly dallying in my deployment zone. Although it looks good in the fluff, I'm not always keen to fight the opponents leader with mine. I tend to not go as over the top with my leaders as some.
George is also not a sure thing, depending on when and where he appears he can be downright devastating. I tried to keep my Aspiring Champions cheap, but I also wanted to give them a purpose so some have upwards of 25 points in wargear. I'm not sure what happens if George possesses someone still in a Rhino. George also needs to get stuck in, he is not as quick as Slim, but with his psychic power can kill hordes of little models faster. I like Slim's chances better against a tough character as Slim might strike first. George strikes last, but being fearsome I hope to route a lot of squads.
The original Plague Marine squad, riding in the original rhino. They're a bit expensive for what they can do. I tried to keep the Nurgling Party Mobile as cheap as possible. I gave Mire Mealta Bombs to give them a chance against any armor they encounter. These guys rush forward capturing ground, they'll be most effective against low toughness, low armor troops that are bunched up. I can dream can't I?
Having killed a Necron Lord last game, Bubonicous the Apoplectic and his squad may well have a go at curbstomping some other characters. They can also do damage to vehicles with my only Power Fist. I plan to stay away from dreads in H2H though, I'll either shoot them up with my dreads or if someone has to fight them let it be George or Slim.
With perhaps the most versatile champion, I have high hopes for these guys. They have my only Mealta Gun, so they may roar forward and give some character a fright, they also can be used to kill vehicles in a pinch. Mainly I hope to use Lupus and boys against troops, this is my best assault squad in my mind.
A staple squad of the Diseased Sons forces. I deliberately did not give them a special weapon or give the champion a bolt pistol, I want these guys to maximize their fire power especially at 24" range. They'll likely be deployed close to Syphilis and Jaundice Squad to form a fire base. If confronted unexpectedly by a vehicle I gave Melanoma the Mirthless Mealta Bombs. I'd prefer to keep all my non green squads out of H2H and rapid firing.
If one squad of rapid firing Plague Marines is good, two is better right? I gave Clametius Mealta Bombs too, making these squads twins. I also wanted some cheap squads both to use as screens and to fill out my army as the assault squads take up a third of my army.
I usually take more of these guys. Thor tells me the rules have changed for them in the latest WD. If their point costs changes I don't know what I'm suppose to do. But if I get Nurgle's Rot for free I'm of course taking it. :-) These guys are mainly included to give me a little variety, a little more H2H punch, and a seventh seven man squad. Nurgle Loves Me, yes, yes, he does. They're also cheap. My bottom 21 models combined cost is 395 points.
Although it is possible they can blow themselves up with their own Plasma Guns. These guys can shoot 24" and will put the fire in my fire base. In standard missions, I plan to deploy these guys first in the best firing position in my deployment zone. I'm not sure they even have to kill much to be worth their points. They seem to draw so much enemy fire I hope to use that to get my assault squads up the field. They are led by Bob the Necessary Evil who is the cheapest of my aspiring champions but I'd prefer George possessed a guy in a squad likely to actually advance. It is unlikely this squad even in the smarty mission will leave my deployment zone.
My first dread and the more versatile of the two. The Autocannon can kill light vehicles and can hopefully mow down two foot soldiers a turn or terrorize a character. Rabaan will definitely be moving forward hoping to get the Heavy Flamer in range. I plan to try deploying my dreads at opposite ends of my deployment zone to minimize the carnage they cause to my side. I hope to set up my Plague Marine fire base in the center.
Named in homage to Owen's many two heavy weapon dreads, Toe Jam was concocted especially to ease my paranoia. I'm worried about losing all my heavy weapons in the first turn before I even get a chance to move or fire. Having two dreads will decrease the likelihood of them going crazy and depriving me of precise supporting fire. I also plan to set them up out of sight ensuring they get to fire at least once. Toe Jam will be deployed last of my three Heavy Support choices and his mission is to take out enemy armor.
Although rolling for the booby trapped objective before moving seems odd, who picks up the booby trapped objective? I guess if you know which one it is, you can avoid it or send in something that is expendable to take the hit. I don't have anything that is really expendable. The objective is destroyed anyway if I know which one is booby trapped I'm staying away man.
I plan to set up my fire base with flanking dreads as the first five units I put on the board. To me this seems like a no brainer. Then I'll put out the three rhinos either in a clump or evenly distributed. They along with Slim will fly forward to capture objectives. The other models will provide covering fire for the most part but can possibly be used to capture objectives really close to my deployment zone.
I'll probably stick to my "fire base five" deployment. My dreads will actually be able to capture table quarters. I'll probably send one dread and one rhino to the quarters to the left and right of my deployment zone. My fire base will hold my quarter that I start in. Slim, George, and the remaining Rhino will be used to counter attack any rushes by my opponent. Night fighting doesn't play that big of a role, by the fourth turn I'll be in close range so I don't care if it gets dark.
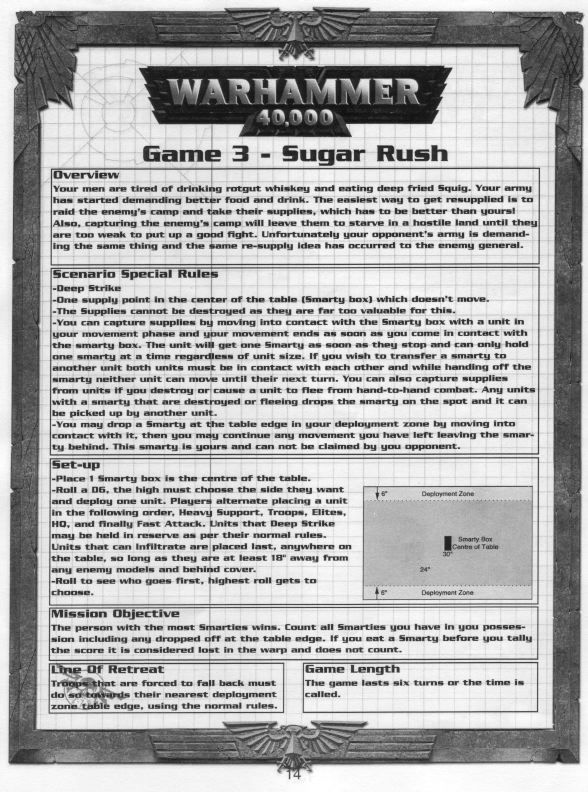
This is the coolest mission. However rather then attempt some clever water brigade type strategy I plan to mob the smarty box. My hope is I don't run into Tyranids or Dark Eldar in this one. Besides having almost no experience against these armies (I hope to get some) they will be quicker then me to the box. If I can get three rhinos around the box, plus Slim and the Neatherworldly Mathematicians. I don't like my opponent's chances of smuggling many smarties off the board. My fire base will likely move forward in this game as well. I forsee a huge H2H hoe down in the center for this mission. My army is built pretty good for H2H hoe downs. I might use one of my bolter squads to run away with a smartie if they get a chance. My dreads will shoot up anything that is fast first, rather then my tradition of shooting up opposing armor first.
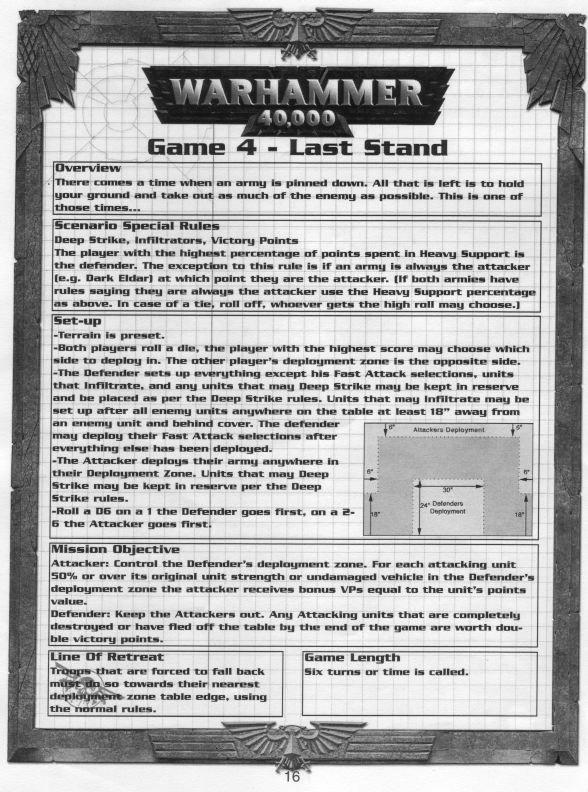
For better or worse I'll likely be the defender in this one. I plan to set up my fire base. The dreadnoughts should they go fire crazy are more likely to do me damage here. Hopefully the enemy will advance and I can get a big H2H mess going on. I'll have to resist the urge to roar forward in my rhinos. In my practice game I contemplated deploying outside of my rhino but decided against it.
Although I've yet to play it, I have a cunning plan. I plan to deploy Diarrhoea and Syphilis squad at the start of the game. Everything else but Jaundice can move reasonably well. Obviously you hope to have your reinforcements arrive promptly. This one has a funnily shaped deployment zone. I plan to drive the rhinos onto the board and get them into H2H, Jaundice will likely not fare so well in this game, but the Dreads should do just fine.
This is another standard deployment battle for me. Firebase in the center, dreads on opposing flanks, Rhinos and Slim placed last. I plan to roar half my army forward while the other half provides covering fire.
But wait there is more...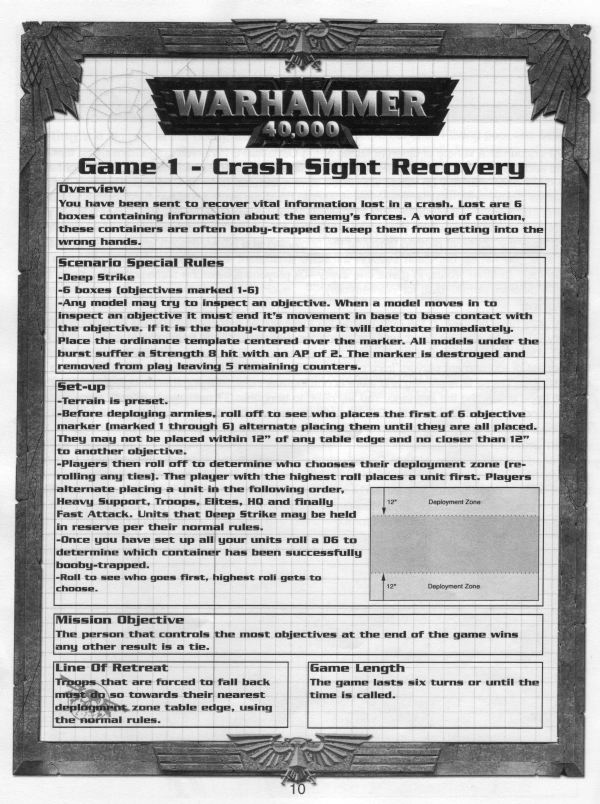