Road to Glory: Game Two
So Malcolm and I got together on this illfated Thursday, I was actually a little worried he wouldn't show. After putting another half dozen or so coats on Isaacous I spent last night buying tape measures plus a token and dice carrying case and of course sawing, cutting, and sanding green plastic, because someone thought we should use the tokens I won...
This was our second game in two weeks and the second game in the Road to Glory campaign. I expected to lose again because once again I chose my army list to try out ideas, models, and squads that I'd never tried before, certainly not in fifth edition. Malcolm also had some evil plan and continues to optimize his army to kill Plague Marines. My unpredictability is probably my best asset in this campaign, that and my large painted miniature collection. I still might have models that haven't seen the gaming table since 2nd Edition. I've slowly been making models and squads legal and if not effective at least interesting. I'm almost done painting the Diseased Sons. Maybe I'll get finished this year or maybe my studies will prevent that. I seriously need to study for the CFA® exam. Update: after years of effort I passed all three CFA exams.
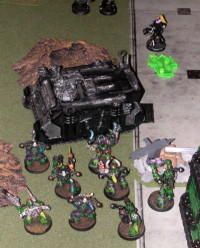
The Diseased Sons Force
The idea behind this army list was to take Nurgle Renegade tactical squads. I actually think unmarked or Chaos Glory carrying tactical squads would be better, but I'm sticking with an all Nurgle army until I do some more painting. I don't think the optimal Chaos army is devoted to a single god.
Besides two ten man renegade squads each with a special and a heavy weapon, I also took out my latest optimal Plague Marine squad candidate. A sorcerer of Nurgle on a Bike is an expensive leader but he can definitely present some unexpected challenges. I wish I could still buy an extra wound because an almost 200 point model which can be instant killed is not optimal in my opinion. I also bought a five man chosen squad to try out flank march and just for laughs I took five special weapons. It wasn't an optimal squad but I haven't had time to paint anything specific for the new codex, Jaundice just happened to have five painted special weapons in it from 2nd or more likely 3rd edition, that is kinda its claim to fame. That and having yellow eyes. I once again took the 65 point scoring unit.
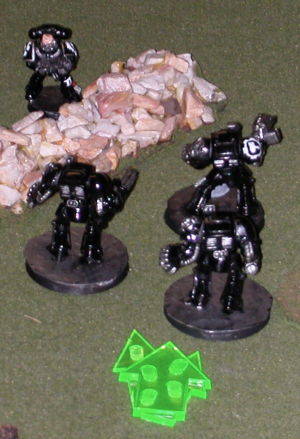
The Iron Hands Force
I took a terrible list. I was so focused on making sure I had scoring units, I forget that I still needed a solid punch to take the Objective. Here's my list:
- Iron-Father, with the usual gear.
- Two Tactical Squads with five Marines, a meltagun, powerfist, frags and a Razorback each.
- Two ten-man Tac Squads with a rocket launcher and plasma gun.
- Five-man Scouts with sniper rifles.
- Eight-man Devastators with four Plasma Cannons.
- Five Terminators with two Assault Cannons.
So, yeah. Limited mobility, limited combat or shooting punch (except for the Devastators who were underwhelming for the most part). I was doomed right from the get-go. I really felt the hole left by the Vindicators and Dreadnoughts, so they'll be back!
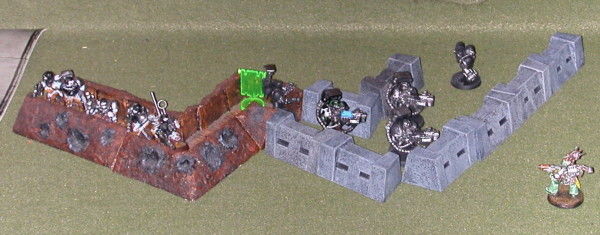
Deployment
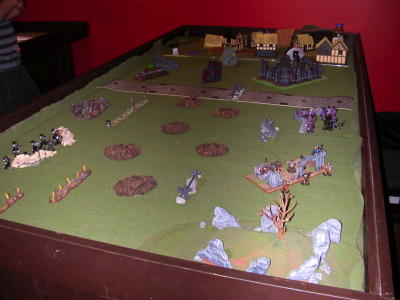
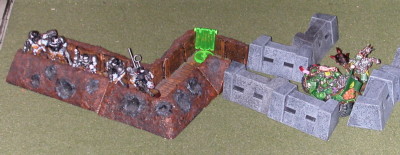
Malcolm won the role to choose sides and what not. I lent him a little green flag for me to capture. I brought my Nurgling infested objectives which I grouped kinda in the middle of my deployment zone. Malcolm put a single tactical squad on the table to my left and declared his HQ wouldn't be deploying and that he would infiltrate his second troop choice.
I too had infiltrators but I wanted to use flank march. I put the Scarlet Fevers around the objective behind the barricade and I put Diereah in a ruined building with my lone Lascannon on the second floor. This army had just two heavy weapons. Isaacous was deployed on the flank with the objective he would lead the assault on the trenches assuming he could arrive there safely. Gangrene was my best objective taking squad but deamons could be used in an emergency.
Malcolm then infiltrated his scouts in the trench. I didn't think this accomplished much. He would have been better served to put a larger squad on the table at the start. Malcolm declared non of his army was in reserve, I kept my deamons and my chosen in reserve so they could use their special rules to enter the battlefield.
Turn One
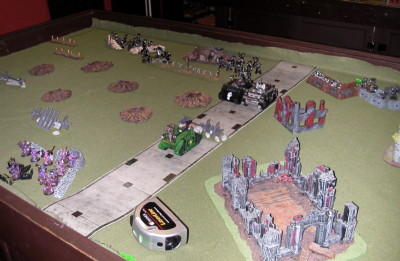
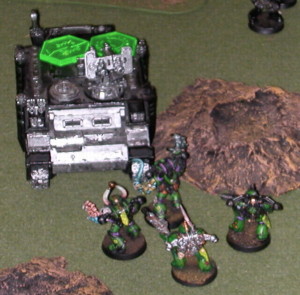
Malcolm got to go first, he once again forgot about night fight, but even without it, he killed nothing. He did roll on two Razorbacks at maximum speed down the road, ran on his terminators, and his secret weapon ran into the trenches. Malcolm's secret weapon was a devastator squad with four plasma cannons.
In my turn I drove my rhino on the road at maximum speed and my bike moved flat out behind a rock. I forgot to move him the turn after but he just managed to survive all the fire that was directed at him on his way across the board. I killed one model in my shooting phase with one of my two heavy weapons.
Turn Two
Stuff happened. There are so many conversations going on in Chinese I'm not sure I can remember everything, but here goes. I had actually out manoeuvred Malcolm to a degree as his trench dwellers had hardly any targets. One razorback went after Isaacous and the other stayed to deal with the plague marines. Malcolm gets to shoot a crazy amount of heavy weapons, I pointed out to him he had six times as many as me, he didn't believe it but it was pretty close. I actually had three now that I think of it, the Havoc Launcher counts as a heavy technically. It never got to fire.
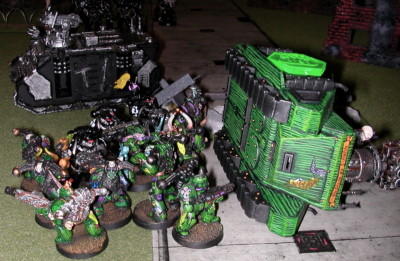
Malcolm doesn't shoot left to right like I do. But he did kill my rhino with a melta gun which was close enough to get 2D6 penetration. He then got to shoot a boltpistol from that squad at my plague marines who got out unscathed thanks to their Fearlessness. He also shot at the survivors with a couple sniper rifles. Then he charged them. I thought this was a mistake or a little overzealous, normally it is better to charge than be charged but he was outnumbered almost 2 to 1.
Before H2H started a bunch of shots were directed at my tactical squads and my leader. Isaacous took one wound, his 3+ invulnerable save due to turbo-boosting was nice. I don't know how many tactical squad guys died, but not many. I think the terminators were within 24 inches now of some of them, which they would soon come to regret.
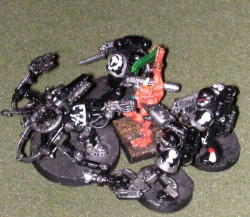
H2H was predictable and went as I expected, ten plague marines including a champ with a powerfist will beat a lesser number of loyalist tacticals despite their powerfist champ.
In my half of turn two I got excited after both of my reserved units decided to show up. So excited I forgot to move my general. This would result in him taking another wound next turn in the shooting phase. Malcolm wouldn't let me move him after I made my first shot. He still got to shoot but it didn't do much.
The plaguebearers were summoned near my leader with his personal icon. They gave him a human shield but also were prepared to sacrifice themselves once again fighting the Iron Father in a doomed assault. This time I thought it might go a bit better as I wasn't assaulting cover.
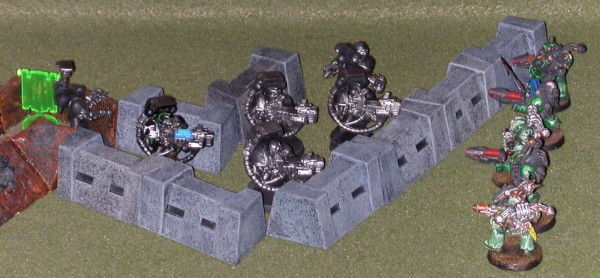
My shooting wasn't a total loss though my lascannon wanked on the terminators. I think the assault cannon shots were saved, but I got to take four bolter shots and managed to kill one terminator, they then ran.
My infiltrators got to come on right where I wanted and yielded to Malcolm's goading and fired every gun, this amounted to one flamer, one melta, and three rapid firing plasma guns. The flamer did particularly well as it got to ignore cover saves. In the end I didn't kill much but it was a shock to Malcolm. This squad would be better with a few more models and either all assault weapons or all rapid fire weapons.
H2H again went how I expected it. The plaguebearers charged in rolled 15 dice and didn't do a whole lot. I did manage to kill one marine. The marines managed to kill three plaguebearers in return but I did make a couple of daemonic aura saves. Due to being Fearless I had to make more armor saves and I made just enough to have one lone plaguebearer fight on, saving my leader from taking any more melta gun or plasma shots. The other H2H fight went my way with the lone loyalist, the sergeant no less legging it. I rolled crappy to pursue but advanced 3 whole inches in my consolidation. This actually may have lead to more dead plague marines.
Turn Three
Turn three was part way finished when Darren announced we had to be done by 7pm. We knew this but Malcolm seemed to think we had more time left than we did. I played my whole third turn knowing that it was game over and likely a draw or at least that I was unlikely to capture his flag in one turn.
Malcolm moved a little, both his fleeing units rallied and got back into firing range. A few more tactical guys died but most of Malcolm's fire power was directed towards the plague marines which were reduced to four models. The chosen were reduced to one model but Malcolm's massed plasma cannon fire also resulted in the death of one gunner. Generous scatters helped a bit. Malcolm also shot one razorback at Isaacous which caused another wound. One I probably wouldn't have had to take if I'd moved... If I moved I would have got to do more damage and would have likely ended up in H2H.
Malcolm's H2H phase saw the end of the plaguebearer but they had at least bought my leader some time to advance further up the field.
In my really quick turn three I sent the plague marines after one razorback. They managed to penetrate it twice with their mealta guns but I rolled 2 both times which resulted in weapon destroyed and immobilized. It didn't matter it was all about the flag. Four plague marines would have a tough time legging it across the board.
My lone chosen had passed his leadership test. One thing about an all Plague Marine army, no leadership tests to worry about. He shot his mealta gun but I'm not sure it accomplished anything. My sorcerer drove over on his bike and unleashed his psychic power. I did not go with the Nurgle one, I think it has potential against massed infantry such as Orks, Guard, and Nids but a more versatile power is Wind of Chaos, the one with the flamer template. It ignored cover and armor saves thus killing 3 or 4 devastators. The chosen charged them and Malcolm goaded me into charging my bike mounted character with one wound over the barricades. I don't what the odds are but there was a possibility I would die and the devastator squad would have been died up for a while fighting the chosen guy. I made my rolls and then Malcolm conceded the H2H and indeed the whole game.
Victory?
I had no scoring units in Malcolm's trench but I did have my leader and a dude with a melta gun, pretty good for Nurgle on turn three. Although it was unlikely I would get a scoring unit across the board on foot. Malcolm had only killed 2 or 3 of my tactical marines and his army would have an even tougher time capturing my objective. Malcolm reasoned it was likely I would be able to kill the scouts thus eliminating his scoring unit in the area so I would win One Objective to none.
Next Time
Even before this game I had made a commitment to taking an army list drastically different next time and not necessarily an improvement even with a few extra points to play with. In the third game I had planned to take basically my planned army for West Coast Mayhem. During our game Darren announced he was now selling tickets and the 40K tournament would be 2000 points according to the poster and U2KR would be running it. That and the fact it will be switched to a two day event make it more attractive after the inaugural years disappointment.
Over our post game dinner and beer I reasoned that 2000 points would get rid of some wankers. A lot of people hire mercenary painters or buy painted armies and these are usually only so big. Malcolm reasoned that higher points would up the average age of participants and the increased cost would also serve as a barrier to entry. I've been so caught up in 1500 or 1700 army lists I have no idea what to do at 2000 points. A lot of crazy ideas become possible, but I don't have the time or energy to do a lot of points. Basically I plan to bring a lot of models, it will be far from an optimal army but I'll have troops up the wazoo. Why not max out troops when you've got 2000 points? On the flip side things like multiple landraiders or forgeworld flyers may become feasible.
I'll have to get out my spreadsheets and start seeing what I can come up with. I need to study more than paint but I don't see why I can paint a half dozen to a dozen models by October. Large projects like my forth dreadnought or an elaborate general conversion are right out, but I will be doing both for next Astronomi-con. Plus a big top secret centrepiece that I really fear will take 60 plus hours or something.
Malcolm's Final Word
Beaten, beaten, beaten. I conceded the game, and I don't think that was a poor decision. Had we kept playing, the absolute best I could hope for was to scrape out a draw (an eventuality the campaign rules don't cover, oddly), while Muskie had a good shot at a win. I deployed poorly, I made bad tactical decisions, and I was out-thought and out-fought. I get the feeling that Muskie's much-spoken-of "return to 2nd Ed" means I'll have to re-evaluate how I combat him. My deployment of the Scouts and the Devastators was just dumb. The two massive Tactical Squads were just as underwhelming as I remember them always being, so changes are in order there. Charging five Tactical Marines into ten Plague Marines was probably the biggest mistake of the game, and the Terminators getting sniped away and running was just embarrassing. Man, did I miss the Vindicators and Dreadnoughts! If that last Plague Bearer had died and I had gotten to charge the bike Sorcerer, things might have gone differently, but the big scrum in the middle really ruined my offensive power, and those Outflanking Chosen were a horrible surprise! Which is ironic, given that I was the one trying to spring a horrible surprise! I have some plans for the 1500 point game, which requires me to do a bunch more building and painting. On the bright side of that, I need to do it anyways for 3000 points, and I have the new washes (I loves them so). On the downside, I still haven't found my non-crappy paint brushes. Argh.
To sum up: I'll get you next time, Gadget! *shakes bionic fist*